목표
- Munin 서버 1대, 클라이언트 1대로 모니터링 구축
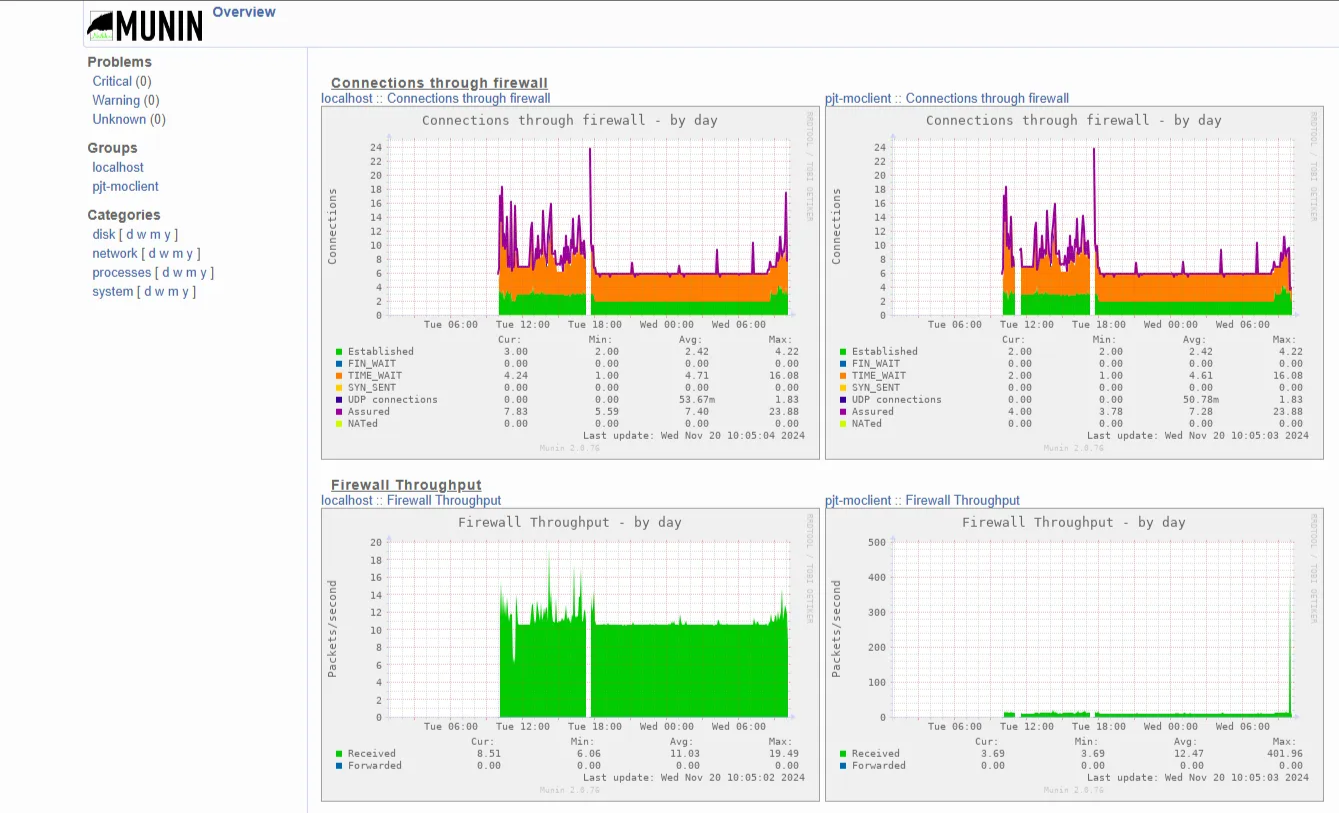
- 웹 인터페이스를 통해 실시간 데이터 시각화
환경 설정
- OS: Rocky 8.10
- Monitoring: munin 2.0.73
개념 및 설정
Munin
/etc/munin/munin.conf
/etc/httpd/conf.d/munin.conf
/etc/munin/munin-node.conf
/etc/cron.d/munin
작업 과정
1. Munin Server
1
2
| useradd -m -G wheel moserver
echo "moserver" | passwd --stdin moserver
|
1) Munin 설정
1
2
3
4
5
| sudo dnf update --exclude=kernel* -y
sudo dnf config-manager --set-enabled powertools
sudo dnf install -y epel-release
sudo dnf install -y munin munin-node
sudo dnf install -y httpd
|
 1
 2
 3
 4
 5
 6
 7
 8
 9
10
11
12
13
14
15
| sudo vi /etc/munin/munin.conf
# 주석해제
dbdir /var/lib/munin
htmldir /var/www/html/munin
logdir /var/log/munin
rundir /var/run/munin
[localhost]
address 127.0.0.1
use_node_name yes
[pjt-moclient]
address <Client-IP>
use_node_name yes
|
2) Munin 웹 인터페이스 설정
1
| sudo htpasswd -s -c /etc/munin/munin-htpasswd muninadmin
|
 1
 2
 3
 4
 5
 6
 7
 8
 9
10
11
12
13
14
15
16
| sudo vi /etc/httpd/conf.d/munin.conf
# /munin으로 온 요청 /var/www/html/munin으로 매핑
alias /munin /var/www/html/munin
# 이 코드가 있어야 상세 그래프 페이지에서 그래프가 나타남
ScriptAlias /munin-cgi/munin-cgi-graph /var/www/html/munin/cgi/munin-cgi-graph
<Directory /var/www/html/munin>
AuthUserFile /etc/munin/munin-htpasswd
AuthName munin-auth
AuthType Basic
<RequireAll>
Require valid-user
Require ip 127.0.0.1 <내 현재 IP>
</RequireAll>
</Directory>
|
3) Munin Node(localhost) 설정
1
2
3
4
5
6
7
8
9
| # vi 편집기를 이용해 수정
vi /etc/munin/munin-node.conf
# 해당 부분 아래에 모니터링 서버 IP를 추가
allow ^127\.0\.0\.1$
allow ^::1$
allow ^172\.27\.0\.74$
sudo systemctl enable --now munin-node
|
4) Munin Cron 설정
 1
 2
 3
 4
 5
 6
 7
 8
 9
10
11
| sudo vi /etc/cron.d/munin
# cron 작업 출력 메세지를 root에게 메일로 보냄
MAILTO=root
# 1분마다 동작
# munin 사용자 권한으로 실행
# test -x /usr/bin/munin-cron: 파일이 실행 가능한 상태인지 확인
* * * * * munin test -x /usr/bin/munin-cron && /usr/bin/munin-cron
sudo systemctl restart crond
sudo systemctl enable --now httpd
|
1
2
3
4
| sudo systemctl enable --now firewalld
sudo firewall-cmd --permanent --add-port=80/tcp
sudo firewall-cmd --permanent --add-port=4949/tcp
sudo firewall-cmd --reload
|
2. Munin Client
1
2
| useradd -m -G wheel moclient
echo "moclient" | passwd --stdin moclient
|
1) Munin Node(Client) 설정
1
2
3
4
| sudo dnf update --exclude=kernel* -y
sudo dnf config-manager --set-enabled powertools
sudo dnf install -y epel-release
sudo dnf install -y munin-node
|
1
2
3
4
5
6
7
8
9
| # vi 편집기를 이용해 수정
vi /etc/munin/munin-node.conf
# 해당 부분 아래에 모니터링 서버 IP를 추가
allow ^127\.0\.0\.1$
allow ^::1$
allow ^172\.27\.0\.74$
sudo systemctl enable --now munin-node
|
1
2
3
| sudo systemctl enable --now firewalld
sudo firewall-cmd --permanent --add-port=4949/tcp
sudo firewall-cmd --reload
|
로그 확인 명령어
1
2
| sudo tail -f /var/log/munin/munin-update.log
sudo tail -f /var/log/munin-node/munin-node.log
|
트러블슈팅
epel-release 설치 후 perl 의존성 에러 발생
localhost와 client의 그래프가 동일하게 나오는 현상
1
2
3
| [moserver@pjt-moserver ~]$ sudo tail -f /var/log/munin/munin-update.log
2024/11/20 08:40:01 [INFO] node pjt-moclient advertised itself as pjt-moooooo instead.
2024/11/20 08:40:01 [INFO] node localhost advertised itself as pjt-moooooo instead.
|
/etc/munin/munin.conf의 address를 172를 설정해야 하는데 127로 기입하는 오타로 인해 생긴 문제
munin 페이지에 htpasswd가 적용되지 않는 문제
- Require ip가 Require valid-user보다 우선되어 Require valid-user는 검사를 안하는 상황
- ReruireAll 태그 안으로 넣어 모든 조건 만족하도록 변경 후 해결
1
2
3
4
5
6
7
8
9
| <Directory /var/www/html/munin>
AuthUserFile /etc/munin/munin-htpasswd
AuthName munin-auth
AuthType Basic
<RequireAll>
Require valid-user
Require ip 127.0.0.1 <내 현재 IP>
</RequireAll>
</Directory>
|
참고
munin 설치:
https://guide.munin-monitoring.org/en/latest/installation/install.html
epel-release 공식문서:
https://docs.fedoraproject.org/en-US/epel/getting-started/